WPInterface includes a built-in widget that allows you to display current weather conditions for your desired location directly on your website. To utilize this feature, you need to obtain an API key and City ID from OpenWeatherMap. This tutorial provides a step-by-step guide to help you set up these elements.
Part 1: Create an OpenWeatherMap Account #
- Visit this page on the OpenWeatherMap website and click the Sign-Up button.
- Enter your username, email address, and password in the provided fields.
- Agree to the Terms of Service by checking the appropriate box.
- Complete the Google “I’m not a robot” CAPTCHA.
- Click the Create Account button.
Part 2: Get Your OpenWeatherMap API Key #
- After creating your OpenWeatherMap account, you will be automatically logged in to the members area.
- Navigate to the API Keys tab.
- Copy the API key listed in the Key column.
- In your WordPress administration area, go to Appearance ▸ Customize ▸ General Settings ▸ Integrated API
- Paste the copied API key into the OpenWeatherMap API Key field.
- Click the Publish button.
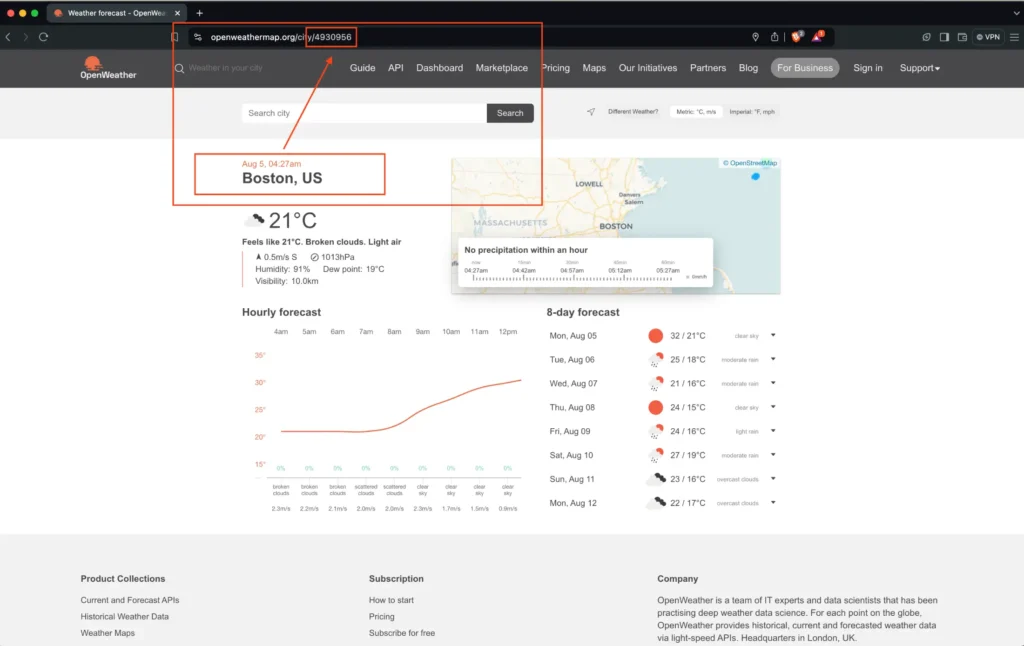
Part 3: Get Your OpenWeatherMap City ID #
- Go to OpenWeatherMap.
- Enter the name of the nearest city or town in the Search field and click the Search button.
- Find your city in the search results and click on its name.
- The City ID can be found in the browser’s address bar. Copy this number or write it down.
- In your WordPress administration area, go to Appearance ▸ Widgets.
- Paste the copied City ID into the OpenWeatherMap City ID field of the Weather Widget.
- Click the Save button.
Following these steps, you can successfully integrate current weather information into your website.


